Growing Mushrooms for Profit
Gourmet mushrooms can be a true cash crop, and they are not as hard as you think to grow many pounds per week! With a modest setup cost, you can easily be earning twenty-five dollars per square foot cultivating mushrooms year-round indoors. In a 12′ by 12′ growing space, that’s about 3600 pounds of oysters or shiitakes per year. Selling for ten dollars per pound, that’s easily $36,000 annually.
All of this can be done as a side job, since minimal interaction with the growing area is required after initial setup, just daily spraying and a keen eye on the progress to keep the overall growth environment conducive to healthy, fruiting mushrooms
In this article, we are going to focus on growing two highly lucrative mushrooms, oyster mushrooms and shiitake mushrooms. These two mushrooms are widely popular all around the world and are relatively easy to grow compared to other strains. This means there is plenty of job security and no steep learning curve involved. For oysters, we will focus on indoor cultivation, and for the shiitakes, we will focus on outdoor cultivation. There are many different ways to grow these mushrooms, but the methods we will focus on are simple and are destined to create big yields.
In this article, we will discuss the most efficient ways to grow them, common problems that might pop up during the growing process, and where to sell them. Before diving into this article, be sure to check out the Beginner’s Guide to Growing Mushrooms to get familiar with the basics of mushroom cultivation and their lifecycle.
Growing Oyster Mushrooms for Profit
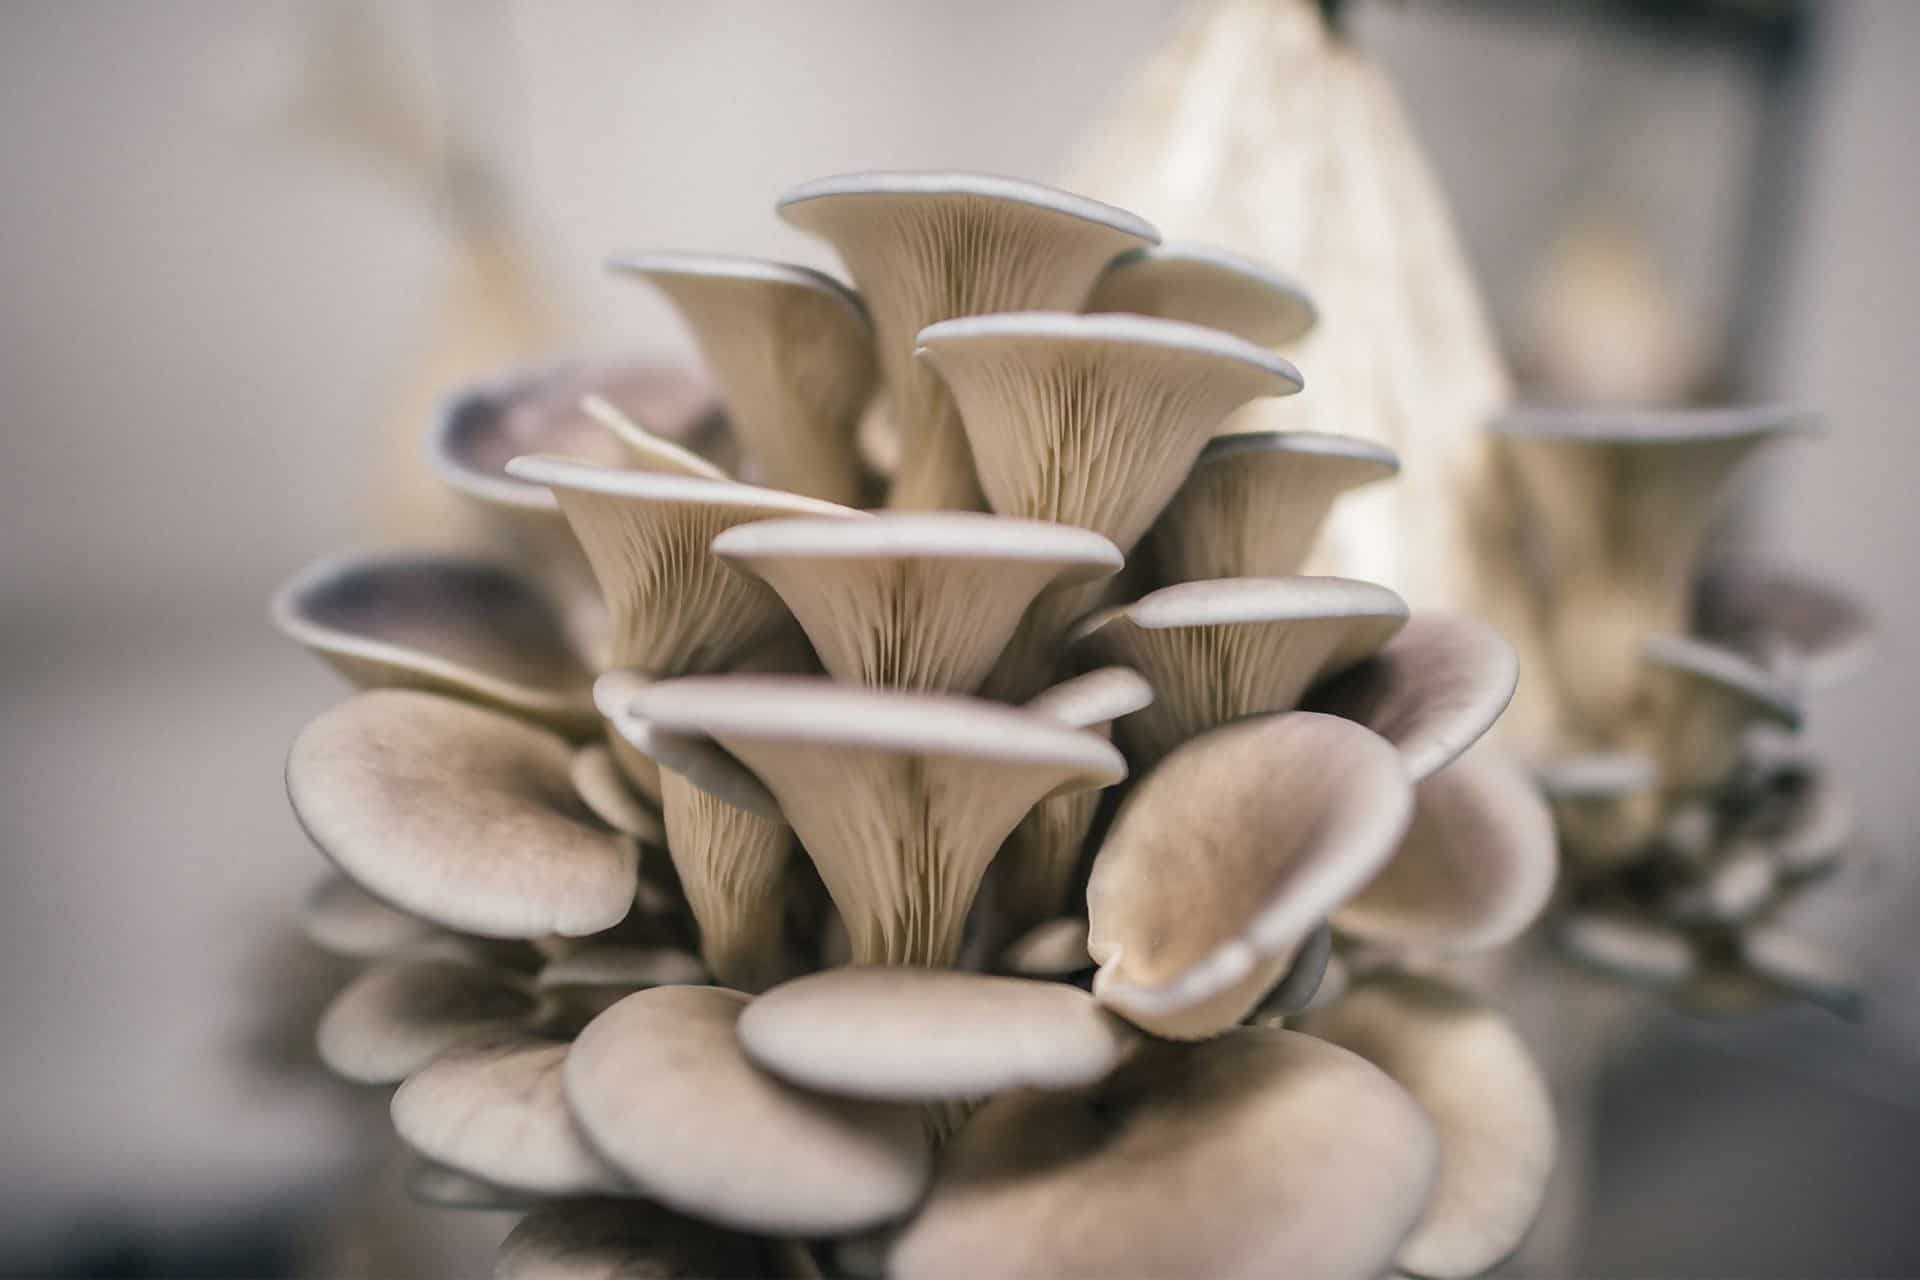
Oyster mushrooms are among the most highly consumed mushrooms in the world. They are well-known for their meaty, great taste and excellent nutrition profile. There is a booming market for this mushroom in the United States and throughout the world.
Currently, oyster mushrooms sell for about six dollars a pound wholesale and twelve dollars a pound retail. Oyster mushrooms are an especially good cash crop mushroom because they are easy to cultivate, grow quickly compared to other varieties, and can be harvested in about six weeks, with multiple harvests over the course of three months. This can all be done in a relatively small space, such as a shed, spare room, or a large closet.
There are many different oyster strains you can grow indoors. This is a comprehensive chart showing the common indoor strains and what conditions will best lead to high yields. In general, indoor growing allows for more tight control over the environmental factors, so virtually any strain can be grown all year.
The Spawn for Oyster Cultivation
When getting started you can either:
- Culture new grain spawn from pure mycelium culture
- Purchase commercial grain spawn from a reputable supplier
The first option is preferred by larger growers who like the flexibility and may chance upon a robust strain that they can store and use for future use. We will not focus on this method, but for those who scale up to large commercial farms, they will commonly bring their cultures in-house in this manner. The drawback is that culturing yourself can be relatively involved and requires sanitary conditions, but this sort of work gets easier with more experience.
The spawn is the “seed” that kick starts the entire growing process. The spawn is added to bulk substrate so that the healthy mycelia can expand and eventually fruit your mushrooms. If you decide on the second option, you can be assured that the spawn is healthy and not contaminated if you’re buying from a reputable supplier, which makes the early stages of cultivation much easier. All that is required is adding the inoculum to the substrate that you have prepared.
The Substrate for Oyster Cultivation
Two common substrates used by oyster cultivators are wheat straw (cut into two six centimeter pieces) and cottonseed hulls, or a mixture of the two. In the mixture formulation, 75% hulls, 24% straw, and 1% ground limestone is a highly regarded mixture that holds moisture very well. For smaller, hobby growers, wood chips and straw are common options, as well. Straw has the added advantage of being very cheap in bulk quantities.
Straw and wood chips provide an adequate amount of nutrients for oyster mushrooms, but mushroom farmers who want to speed up their production and increase yields normally add dry supplements to their substrate. Some common dry supplements include feather meal and treated soybean.
This is added 3-6% of dry substrate wight to stimulate mushroom yield. Yields have increased 90% when 6% dry supplement is added at the time of spawning. Since dry supplements tend to increase the temperature of the substrate (through chemical reactions), it’s important to keep aerating the substrate and watch out for temperatures over 95F, where bacterial contamination and mold can begin to attack the mycelia. Ideally, a temperature in the mid-70s is best for oyster growth. Lower temperatures than this and the fungus may develop fruiting bodies too slowly and any higher, the fungi may deteriorate.
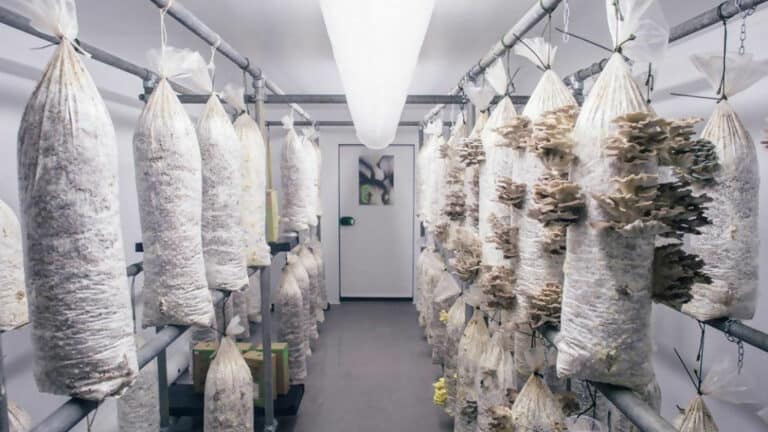
Using Plastic Bags for Oyster Cultivation
Oyster mushrooms can be cultivated in profit-quantities in plastic bags or bottles. For the former, polyurethane bags are best-suited for oyster mushrooms because of their durability and great resilience to high moistures and temperatures.
Large polyurethane bags are approximately 8 inches wide by 5 inches deep by 18 inches tall. These can easily hold up to 5 pounds of the inoculated substrate and can be added to a pressure cooker or autoclave for the sterilization process before inoculation. These bags are designed for breathability and fruiting because they have filters on top and will maintain structural integrity over a wide range of moisture and temperature. These can be found online here.
Polypropylene bags can withstand the high temperatures needed during the pasteurization process. In a pressure cooker or autoclave, the substrate bags are placed in about 250F water (three or four inches in water depth) for at least 90 minutes. Approximately six of these bags can fill this relatively cheap sterilizer. For larger-scale growing operations, large pots to pasteurize in are common, such as a 55-gallon drum heated with a propane fuel source outside.
Adding the Oyster Spawn and Colonization
Once the substrate bags have been pasteurized and cooled, it is time to inoculate them. Many reputable suppliers sell a variety of oyster strains. Fungi perfecti is a good choice or Fungially.
Inoculate each bag with a half cup of oyster grain spawn. In general, you want about 10% of the total weight to be spawn, so if you bought 20 lbs of the substrate, about 5lbs of it should be grain spawn. Shake the bags to distribute the spawn throughout the bag evenly. Seal the top of the bags with a small piece of wire or zip tie. The bags can then be placed on a tiered shelf, about six inches apart. The full colonization will take approximately 10-15 days.
If the bags develop any dark spots of brown or green, this indicates a mold infection. Remove these bags immediately from the shelf and discard. Likely, too warm of temperature led to mold spores overtaking the mycelia or the pasteurization process wasn’t hot or long enough.
Fruiting Oyster Mushrooms
When they are fully colonized (turn white from the mycelia), cut a large X into the side of the bag. The open bags will allow oxygen flow which will stimulate fruiting. Smaller holes can be cut in the bags for the mushrooms to grow out of.
Move into the fruiting room where the high humidity, low C02, and indirect light will help stimulate fruiting. If you want to keep the humidity high manually, liberally spray the bags twice daily. Otherwise, a humidity tent or humidifier can be used to keep the humidity above 85%. If the humidity is too low, the mycelia will dry out and the mushrooms will not fruit.
The oysters should fruit within ten days. At first, little pinheads will begin to form. These pinheads will rapidly grow, approximately doubling in size every day. Harvest when the caps begin to flatten out or curve slightly upwards.
Harvest with a small knife or twisting from the base. After harvesting, let the bags sit for four to five days. After that, begin misting daily again and keep them in indirect sunlight and they will produce a second flush.
About thirty 5 pound bags of substrate will yield up to ten pounds of oyster mushrooms. Each bag can be flushed about three to four times over the course of thirteen weeks, with each flush creating slightly fewer mushrooms. After the final flush, the substrate can be removed and broken up and added to your compost or as a mulch in the garden.
Using Bottles for Oyster Cultivation
If you don’t want to use grow bags, large wide-mouthed mason jars or plastic bottles also work well. Plastic bottles are also commonly used by growers. They come in different sizes and shapes tailored to the growing room. The bottles are fitted with synthetic filter lids that allow gas exchange but prevent contamination. When the spawn run is complete, the lids of these bottles are removed and the mushrooms grow upwards out of the bottles.
This method originated in Japan and has the added benefit of being efficient and environmentally-friendly (because they are very reusable). Bottle-grown oyster mushrooms are also consistently uniform in structure, which is an ideal situation when you are selling to any farmer’s markets or local restaurants.
Bottle cultivation occurs indoors in a temperature-regulated room, between 61-68F. If it is too warm, bacteria and mold can grow and out-colonize the mycelium. This is especially important to consider if adding dry supplements to the substrate, which can raise the temperature considerably.
The bottles must stay consistently moist so they must be either manually sprayed two to three times daily or, ideally, a centralized humidifier must be used so the humidity can stay between 96%-98%. In terms of lighting, regular fluorescent light is all that is required to grow optimally. No need for fancy UVB lights. For the first few weeks during inoculation, no kind of artificial lighting is needed, but during fruiting, some lighting is required to stimulate growth.
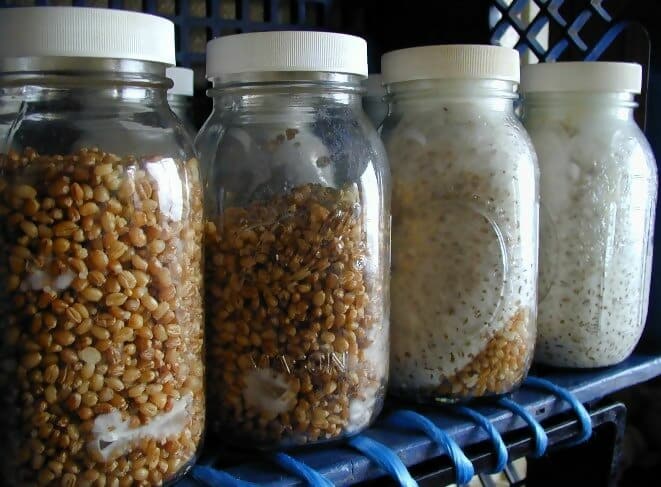
Prepare the Bottles and Sterilize
If you are using glass mason jars, buy synthetic filter lids or modify the lids by cutting a quarter-inch hole in the top and stuffing polyfill inside. Fill the jars about a half-inch from the top with master’s mix, a 50:50 mixture of soybean hulls and hardwood sawdust. Once filled, cover the lids with aluminum foil to prevent water leakage and put inside the sterilizer. Fill the sterilizer so that the water is about halfway up the jars and put the pressure on at 15PSI for 90 minutes.
Inoculating the Substrate Bottles
To inoculate the pasteurized grain spawn in bottles, make a small hole at the center of the substrate and place the grain spawn in there. This is best done in a laminar flow hood but a still air box can also be used.
Since plastic bags have their spawn thoroughly mixed with the substrate while bottle cultivation cannot be mixed, bottles will lead to slower colonization times. After inoculation, the bottles can be placed on a large tray. Usually, a large metal tray can hold up to sixteen bottles. This method has the added convenience of not requiring much space and can work well in a spare closet or bathroom.
Normally, full colonization will occur in about three to four weeks if all the right temperature, humidity, and nutrient conditions are met.
Fruiting Oyster Bottles
Once the bottles are colonized, the first few millimeters of the mycelium are normally scratched off, which helps stimulate even growth of the fruiting bodies. From here, about four hours of regular fluorescent light (50-300lux) on a daily basis is needed to grow well.
Once pinning happens after a few days, be sure that the room is properly ventilated. Excess carbon dioxide can lead to thinner mushrooms and poorer yield. You want about 900ppm of C02, having a few open windows and a small fan works well to keep the environment well ventilated. Mist daily as the mushrooms double in size. In 7-10 days, they will be ready for harvest.
Common Oyster Cultivation Problems
Contaminants
If the mushrooms have streaks of orange and start to crumble easily, this may be a sign of a bacterial invasion. Usually, this is caused by Pseudomonas tolaasii that commonly infects oyster mushrooms and white mushrooms. This can be caused by too high of a temperature, poor ventilation, and poor moisture control. All of these unbalanced environmental factors can impair the mushroom immune system, disrupt the mycelial network, and lead to pathogenic invasion
Too much moisture can cause these bacteria to multiply quickly and overrun the mushrooms. If you start to see this happening, try lowering the humidity to at least 85% and sterilize the area with a weak bleach solution (approximately 0.2% bleach). This can be sprinkled directly on the infected mycelium.
If there are other contamination spots blue or brown in color, this may be due to green mold. This can be caused by too warm of a temperature (95F or higher). These bags or bottles should be separated from the rest and discarded.
If there are flies or other insects, this may be due to a lapse in hygiene in the growing area. Make sure the substrate is adequately sterilized, and keep the grow room clean by wiping down the shelves and grow area with weak bleach wipes. Make sure the area is also properly ventilating with a nearby window or air blower. For preventative measures, you can place fly traps around the bottles and bags. This is an effective method for manually removing fruit flies that may disturb the growing process.
Morphological problems
Physical deformities can be caused by a variety of things. While they may still be edible, they may not sell well because many customers want normal, healthy-looking oyster mushrooms.
Besides the contaminants listed above, physical deformities of the caps and stipes may be caused by inadequate lighting, poor ventilation in the grow area, the presence of smoke, foreign chemical vapors in the grow area (car exhaust or pesticides), and high temperatures of the substrate (above 95F).
Growing Shiitake Mushrooms for Profit
Shiitake mushrooms are the second most commonly consumed mushrooms after the common white button mushroom. They are widely sought after for their savory, meaty flavor and surprising health benefits. Similar to oysters, shiitakes sell for approximately ten to twelve dollars a pound retail and six dollars a pound wholesale.
Shiitake Substrate: Hardwood logs
Instead of plastic bag or bottle cultivation, shiitakes are grown best outside on wooden logs for profit. Several different hardwoods are ideal for shiitake cultivation, including cottonwood, aspen, poplar, beech, alder, hornbeam, pecan, birch, and especially white oak and post oak.
When the leaves begin to fall off the hardwoods that shiitakes like to colonize, this is when they are ready to be cut down and used for mushroom cultivation. Late winter or early spring is the best time to cut the hardwoods down. At this time, the sugar content in the trees has peaked and the mycelia are best able to feed off the nutrients and fibers in the logs. These logs are then cut into approximately one meter long segments. In terms of diameter, the logs must be between 7cm and 15cm. Any wider and the logs may need to be cut in half.
The Spawn
Spawn plugs are the best choice to use when inoculating hardwood logs. These are wooden dowels that have shiitake mycelium inoculated in them. This is preferred over sawdust spawn because of their ease of use. Spawn plugs can be purchased here from Northspore or here from Fungi Perfecti. Choose strains that work well for the climate in which they will be growing. If the climate is cold and gloomy, choose a strain that doesn’t require lots of sunlight and that can withstand colder temperatures. If you live in a warm climate, choose a strain that can survive higher temperatures.
Inoculating the Hardwood Logs
It takes only about a week for the shiitake mycelia to colonize the logs when they are prepared correctly. To inoculate the hardwoods, a high-powered drill is required. Using a 5/16” drill bit, drill 1 inch deep holes in three rows in a diamond pattern around the log. Start the first hole approximately 3.5” from the edge of the log in the first and third row, with each succeeding hole spaced about 10” apart from the previous hole. The last hole should be about 3.5” from the other end of the log. In the middle row, the first hole should be about 10” from the edge of the log. Drill succeeding holes 10” apart like the other two rows until you reach 10” from the other end. Each adjacent row will be about 1.5”-2.5” away from each other. This diamond pattern gives the mycelia plenty of surface area to cover the full grain of the log and will maximize the success of colonization.
Once the logs are drilled, you will need the plug spawn and a rubber mallet. Hammer the plugs into the wood one by one, and fill the holes with melted wax that can be purchased here. The wax helps seal off the inoculation points from contaminants like insects and other wild fungi. There will be approximately 30-40 plugs used per log. The spawn plugs are typically purchased in bags of 100, so several will be needed if making a sizable grow.
The Shiitake Growing Environment
Once the logs are drilled and plugged, stack them horizontally in a square pattern. Two logs should be placed perpendicular to the other two logs to form a square. Some cultivators will lean the logs against a wall or fence, and this also works well. You want to minimize the contact with the ground at this point. The spawn run (or time for inoculation) is much longer than oyster mushrooms, approximately 8-18 months.
During incubation, the environment should mimick their natural fruiting environment and be moist and cool. To moisten and hasten the inoculation process, the logs are soaked in cool water (a spring or cool-watered stream works well, or even a small inflatable pool with cool water in it) while they are incubating for one to three days. Keep the inoculating logs in nearly full shade.
Harvesting the Shiitakes
Once the logs are soaked, this stimulates the fruiting process, which can typically start to begin in a few weeks. After soaking, the logs are rearranged into an X pattern. Using a strong fence, lean the logs close together in a left-right pattern so that the tops form an X.
After a week or so from soaking the logs, white dots or bumps will begin to form. This is the beginning of the “pinning” process. If this doesn’t happen after a few weeks, another soaking can help shock the logs into pinning mode.
Once this has happened, cover the logs with a white woven frost banket. Too much rain at this point can cause soggy mushrooms. A cloth covering can also help shield the pinning mushrooms from wildlife that may disturb the growth.
Shiitakes will be harvestable within 7-10 days from soaking, sometimes longer if the temperatures are cool.
When it’s time to harvest, you can cut the mushrooms off the substrate with a small knife or twist them off the base. Harvest when the gills are visible, and the outer edge of the cap is beginning to curl under.
Once harvested, refrigerate the shiitakes in a paper bag. They will remain fresh for over a week, or they can be dried in a dehydrator for long-term storage. In terms of yield, one-quarter to one-half pound of fresh shiitakes per log is common.
Common Problems in Shiitake Log Cultivation
The most common problem in outdoor log cultivation is imbalances in moisture. The ideal moisture content for the logs is somewhere between 35%-45%. To determine the moisture content, you can weigh the logs pre-inoculation and after inoculation in the subsequent months.
If the logs are lighter, they are losing water, and if they are heavier, they are heavy with water. Too much rain or humidity, over 60%, can cause an abundance of water in the logs which can disrupt healthy growth. If the logs are too dry, you can water them non-stop for a few days, then the surface can be dried with an air blower (industrial-sized fan). If the surface is too wet, mold or bacterial contamination can set in and colonize it.
In terms of temperature, shiitakes are relatively resilient and will grow between 40-89F. Ideally, somewhere between 71-78F is a good growing temperature. Placing a canopy or tarp over the logs can help maintain the temperature and facilitate the incubation process. At least 80% shade will be optimal to produce the best harvest.
Selling Your Mushrooms
There are many ways to sell your gourmet mushrooms locally. Farmer’s markets are usually in high-demand of fresh gourmet mushrooms. Many small growers will set up a tent or booth and sell a variety of mushrooms. The more variety, the more likely this will attract customers. This option typically requires adherence to certain local regulations or the need for insurance, which may detract from the overall revenue.
Other growers will sell directly to local grocery stores and local food co-ops. Since gourmet mushrooms like oysters and shiitakes don’t ship very well over long distances, local grocers and co-ops prefer to buy local.
Many gourmet mushroom growers also sell their freshly harvested mushrooms to local restaurants and chefs. This choice will likely lead to the biggest profits, especially if you are well-networked in this industry.
This is a great option because these businesses strive to buy large quantities of high-quality mushrooms at retail prices. Additionally, many chefs know the other chefs in the area, which can increase your odds of finding more clients if they have a positive experience with your transaction.
When networking with the local community, it’s a great idea to bring along a small sample of your grow so that they can have a look or taste for what they may buy. Then, create an invoice for each client so you can keep track of who is buying what and when. Once you have a stream of clients, each client may want a delivery once a week of 5 pounds or more.
While many will buy your mushrooms fresh, you can also dry them or freeze them to sell at a later date. Dried shiitake mushrooms are packed with umami and are highly desired by restaurants to boost the umami in a wide variety of dishes.
Final Thoughts
If it is your first time growing either oysters and shiitakes, it is a good idea to start with a grow kit. These kits are inexpensive and are already inoculated. They require just a manual misting of water twice a day, and are generally harvestable in about ten days. This will help you to get familiar with the lifecycle of the mushroom and you may start to get familiar with troubleshooting some of the common problems that growers face. After a successful harvest or two, you can scale up to bags, bottles, or try outdoor growing.
Finally, mushroom cultivation is a never-ending process of learning and fine tuning. Thankfully, there are tons of online resources where you can learn insider tips and talk to other mushroom cultivators to troubleshoot your grow. This page has a comprehensive listing of mushroom cultivation resources. This MushroomGrowers Reddit community is a great place to learn from amateur and experienced growers. You can post pictures of your grow and learn a lot by communicating with that community.
Overall, if you have a few hours of week to spare and a suitable environment to grow the mushrooms in, it’s possible to make upwards of $60,000 a year growing oyster and shiitake mushrooms.